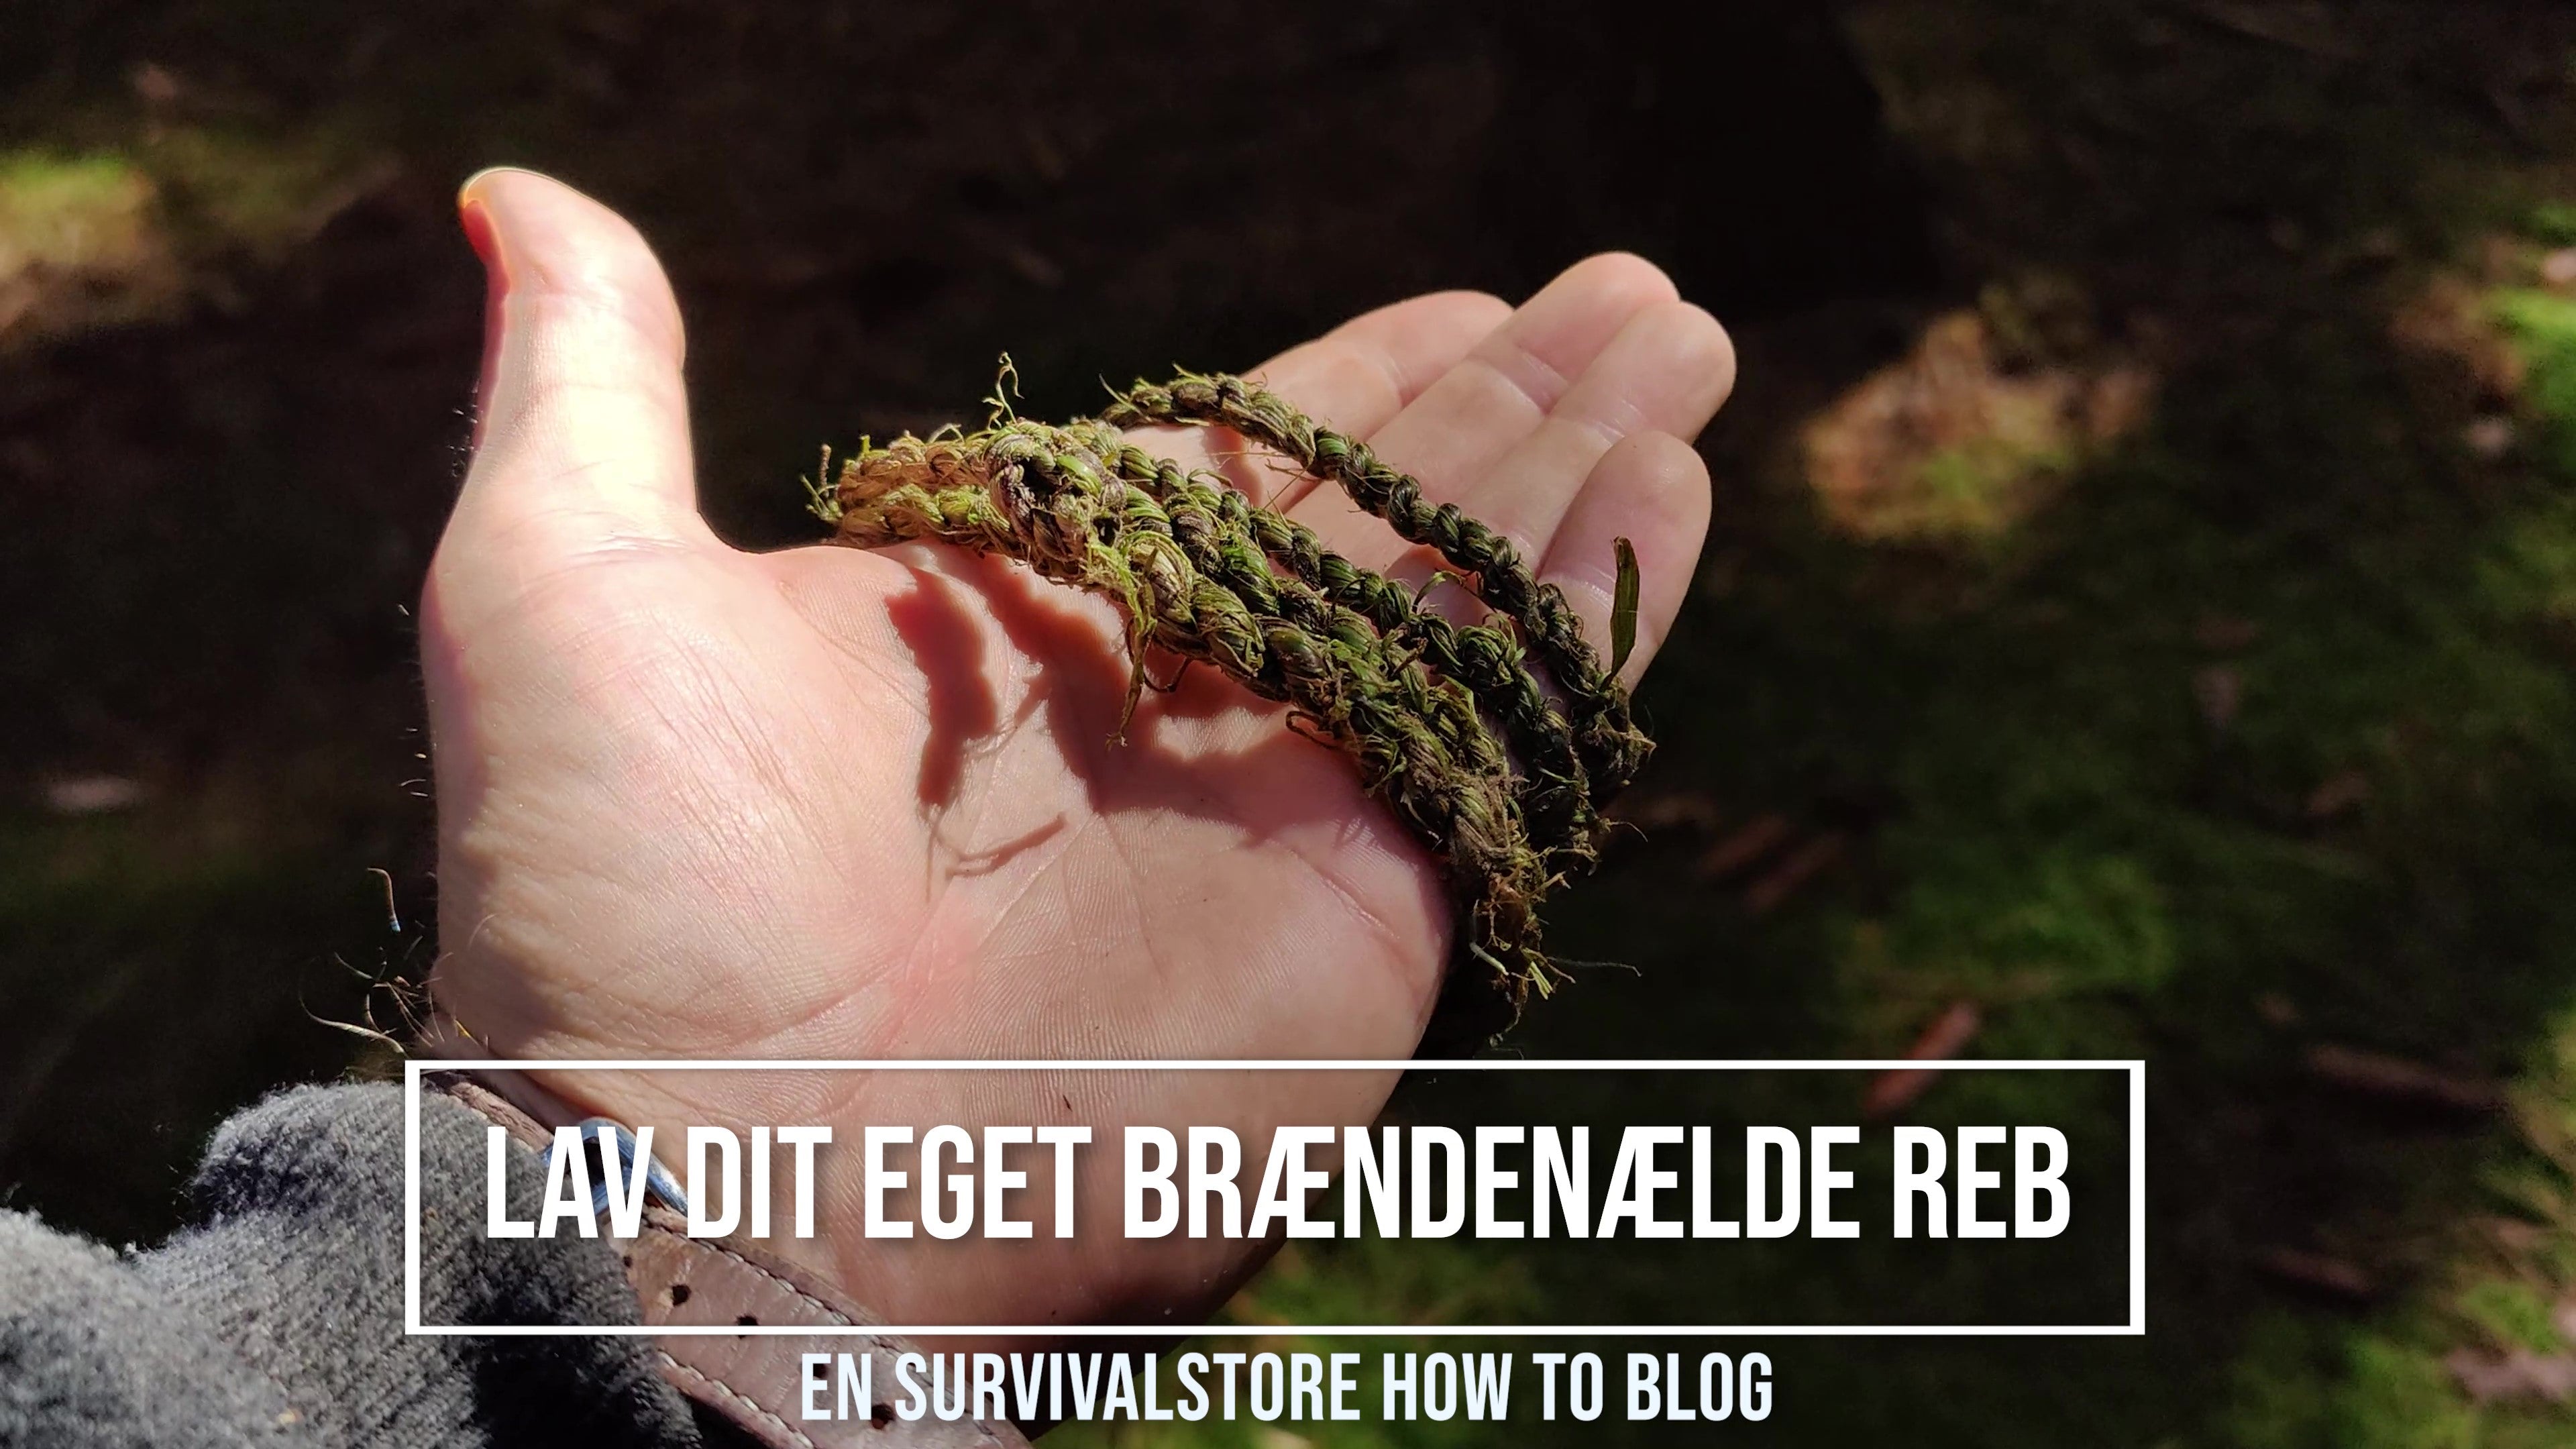
Make your own nettle rope.
Nettles are a highly versatile plant! You can use them as tea, eat them raw, cook with them, and after reading this blog you can also make your own rope from them. This blog explains one of the methods.
Nettles are an important part of the outdoor and bushcraft world, as it is a plant that possesses powers that are extremely useful and that we should take more seriously.
Nettles are full of vitamin A, vitamin C, manganese, potassium, and calcium. They are cleansing as tea and have anti-inflammatory effects against inflammatory conditions in the body.
Henrik Smid, a Danish medieval doctor, once said that if the average person only knew about the medicinal properties of nettles, they would not just step on it, but instead treat it with respect.
In this blog post, however, we will not consume the nettle, but with simple techniques turn the nettle fibers into a strong, flexible, and durable rope. This process definitely falls under the category of Bushcraft, as we use knowledge and technical skills in nature to manage in the best and simplest way.
Small nettle and large nettle
There are two types of nettles we need to distinguish when making rope. They are Urtica Urens (small nettle) and Urtica Dioica (large nettle). They basically have the same characteristics, but Dioica, the large nettle, is much bigger and therefore more time-saving to make rope from.
Both sting with their white hair-like stings on stems and leaves, so in the first steps of the process it’s a good idea to use rubber-coated gloves.
If you get stung, just leave it be. You don’t need to apply dandelion sap or perform a pagan dance to stop the itching. The harmless toxin in the stings usually loses its effect on the skin after 15-20 minutes, so arm yourself with patience and don’t scratch.
Step 1: Find and gather

To make rope, we need to find the large nettles we will use. They grow in nutrient-rich soil, especially at forest edges, gravel roads, ditches, and hedges. Remember to wear long pants and move slowly through the patch of nettles to get the ones you need.
You need a lot of nettles! If you want a rope you can use practically in the forest, you need between 40 and 50 nettle stems. That will give you about a meter of rope with a thickness around 0.5-0.8 mm. Of course, you can also make finer rope, where the thickness is only 3-4 mm, which requires fewer fibers at a time. It depends on what tasks you have in mind for the rope.
My advice is, don’t count too carefully, but gather a large bunch of nettles and take your time. All the practical parameters and preferences will come once you are familiar with the process.
Step 2: Branching

Now all the leaves need to be removed from the stems. This is easiest done with gloves, as mentioned. Grab the top of the nettle, pinch together with your index finger and thumb, and slide them down to the bottom of the stem. In a With a sliding motion, the leaves should come off without much trouble. If there are some leftovers, you can pick them off afterwards. The leaves can be used for tea, soup, or pesto, but that’s another story for another blog.
Step 3: Crush the stems
Now the stems need to be crushed to loosen the outer fibers from the hard inner core. You can crush them using your thumb and the handle of a knife, but one method I prefer is a bit more primitive.
Find a good round stone, not too heavy, place one or more stems on a hard surface like a tree stump and beat away. You will now see how the fibers loosen from the core, and it will look a bit messy. But don’t worry, the fibers are strong and can handle it.
Be careful in this step because the more precisely you separate the fibers from the stem, the easier they are to peel off afterwards.
Step 4: Separate the fibers from the core
Now we need to separate the fibers from the core. You can do this in several ways. You can break the middle of the stem over, and let the fibers detach themselves when you move the core in the opposite direction, or you can start at the end you can best grip and tease the fibers up along the stem.
Sometimes you can get it off in one piece where you can then separate it finer, and sometimes it comes off in several pieces. The important thing in this process is to get the fibers as long and intact as possible.
The small and half fibers that sometimes come off can be used and braided in, so you can save those too.
Step 5: Drying

It’s important to dry the fibers before making cord. If you make rope from fresh fibers, the moisture dries and the fibers shrink. This destroys the tightness in the rope’s structure, and thus also the strength of your rope.
You can dry it in several ways. On a cord, on branches, on stones, or close to a fire. The radiant heat from the fire is an effective method, just make sure to keep enough distance so all the hard work doesn’t go up in flames.
The sun’s rays are also effective and can dry the fibers in a few hours, as long as you spread them out enough. If they get too dry, they can become brittle and break easily. If that happens, you can moisten them in a water bath. They should be dry but still flexible.
Drying in humid weather can take a long time, 1-2 days before the fibers are completely dry and ready to use.
Step 6: Let’s do the twist!
After drying, it can be helpful to keep the fiber bundles slightly separated to avoid too much tangling.
Now we’re ready to twist them together into a strong rope.
Take a bunch of fibers you think is appropriate for the size of your rope.
Lay them together and straight.
Now take the middle of the length of fibers you have and start to twist the fibers. Your right thumb and index finger twist away from yourself, and your left thumb and index finger twist toward yourself. For left-handed people, this process may be reversed.
The middle of the fibers now starts to tighten and become dense. Continue twisting and keep tension on the middle of the fibers until the middle twists itself together. Now you have a beginning to your rope.
Pinch the twisted middle so it doesn’t come undone.
Step 7: Twist, grab, twist, and repeat

It sounds wild, but it’s a nice rhythm to get into.
Now you have a start on the rope. Pinch the rope’s first twist with your left index finger and thumb, then take the length of fibers farthest from you and twist away from yourself.
Twist away from yourself until you feel it tighten, while holding the fibers so you don’t lose the tension. Grab the underlying fibers from the other part of the rope between your index and middle finger, and twist upward and away from yourself.
Now you can move your left index finger and thumb further down to press on the rope where you’re about to twist again. The fibers have now swapped places and the next section of the rope is ready to be twisted.
Here’s how to continue. Twist the outer fibers, grab and twist the underlying fibers upward and away from yourself, then repeat.
When you’re finished or run out of fibers, you can tie a knot at the end of your rope.
You can now use your rope for tasks in the camp, garden, or indoors. Anything you can use regular rope for, you can use nettle rope for. The rope isn’t always equally strong in structure, so you have to experiment with what it can hold and practice making the structure strong.
It’s possible to set up a camp using only nettle cord.
It’s stronger than you’d expect!
Also see our video a little further down 👇🏼
