From the earliest times, humans have always needed to make holes in wood and other materials. Although it may seem like a simple task, throughout history it has often been associated with both difficulty and ingenuity.
Making holes requires a special tool: the bit.
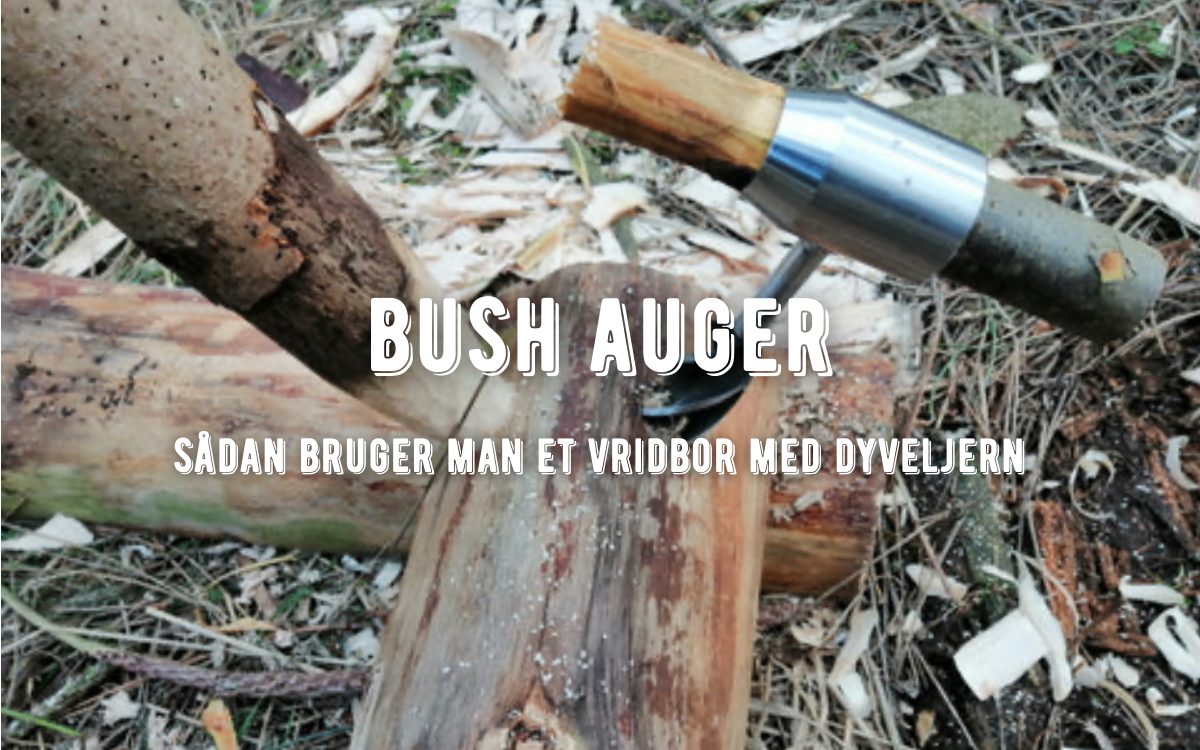
What is a hand brace?
Bush auger – or more traditionally in Danish, hand brace – is a simple but powerful tool for drilling holes in wood.
In this version, the tool is also equipped with a dowel iron, which we will return to later.
The development of the bit
The first bits were actually just an evolution of the awl. Later, when humans began working with iron, new types of bits were developed – including the spoon bit.
With these, you could drill larger holes in wood and work more efficiently.
Later came the auger bit, which made it possible to drill more precise and uniform holes. An important detail in this development was the small pilot bit located at the very tip.
This small pilot bit has several functions:
It helps center the bit
It controls the drilling direction
It pulls the bit into the wood

Therefore, it is also important to protect this part of the bit. If the pilot bit on your bush auger gets damaged, the bit will not function optimally.
A good tip is to put a cork stopper or a small wooden block on the tip when it is not in use. Many also choose to use or make a leather holder to protect the tool.
The advantage of a bush auger
The bush auger differs from traditional hand braces by being made in a compact travel version.
The old hand braces were often long and cumbersome to transport, but the bushcraft version is short and easy to carry in your backpack.
However, the short design also means there are some limitations. If you need to drill through very thick materials, the bit simply cannot reach all the way through.
On the other hand, the possibilities are many.
With a bush auger, you can among other things make:
Shelves
Small Furniture
Racks
Stools and Chairs
Workbenches
Hooks and hangers
In practice, it is almost only your imagination that sets the limits.
How to use a bush auger
The clever thing about a bush auger is that you don’t need a fixed handle.
You just need to find a stick or branch that fits in the hole of the bit.
It is an advantage if the stick fits somewhat tightly – this way you avoid it falling out.
A length of 20–30 cm typically works well.

When you begin drilling with a bush auger:
Start slowly
Turn the bit slowly around
Apply moderate downward pressure
Make sure to keep the bit straight – especially at the start
During work, it can happen that the handle gets in the way of some of your previous work. In those cases, you can simply use a shorter stick as a handle.
When the bush auger bit gets stuck
The bit works best in fresh wood.
If you find that the bit won’t go further into the wood, try turning it slightly backwards. This helps to lift the shavings out of the hole.
Sometimes it may also be necessary to:
remove the bit completely
empty the hole of shavings
and then continue drilling
Bush auger with built-in dowel iron
At the opposite end of the bit – where the handle is attached – there is a slanted and slightly sharp opening.
It is the dowel iron.
This part of the tool is used to make wooden dowels.
A dowel is basically just a piece of round stock used for joints in wood. If you think of old timber-framed houses, the wooden sticks that hold the joints together are actually just large dowels.
How to make dowels
The dowel iron is used by striking it down over a stick or piece of wood along the grain.
When the wood is pressed through the iron, it is shaped into a round dowel.
Not all wood species are equally suitable for this. The best types of wood for dowels are typically those that:
splinters or cracks easily
have long fibers
and preferably should be relatively hard
It produces stronger dowels with better breaking strength.
Bush auger - a simple tool with many possibilities
A bush auger is one of the tools that really opens up possibilities in bushcraft.
With just a few tools, you can start building:
furniture
stands
camp equipment
or other practical constructions in nature.
And that’s exactly why the auger has become a staple tool in many bushcrafters’ backpacks.
Which wood is best to drill with a bush auger?
When using a bush auger, you’ll quickly notice that different wood types behave differently. Generally, a bush auger works best in fresh or slightly damp wood, as the fibers are still flexible.
Wood types like birch, spruce, and pine are often easy to work with and are found in many places in Danish nature. They are relatively soft and therefore offer less resistance when drilling.
Harder wood types like oak or beech can also be used but often require a bit more strength and patience. In return, they provide very strong joints, which can be an advantage if you’re building furniture or structures meant to last.
If you’re unsure, you can always test the wood by making a small trial hole. This way, you quickly get a sense of how hard the wood is to work with your bush auger.
Maintenance of your bush auger bit
A good bush auger can last for many years if you take proper care of it.
After use, it’s a good idea to wipe the bit, especially if it has been used in damp wood. Moisture and wood sap can eventually cause rust or reduce the bit’s effectiveness.
If the bit becomes dull, it can sometimes be sharpened carefully, but be careful not to change the shape of the tip. This part is crucial for the bit to pull itself into the wood.
Many bushcrafters store their auger in a leather sheath or a small tool pouch to prevent the tip from being damaged during transport.
A bush auger is a simple but incredibly versatile tool. With it, you can quickly drill holes in wood and make sturdy joints, allowing you to build everything from small stands to stools and other practical solutions in the camp.
With a little practice, it quickly becomes a tool that opens up many possibilities in nature – and that can easily earn a permanent place in your backpack on your next trip.