
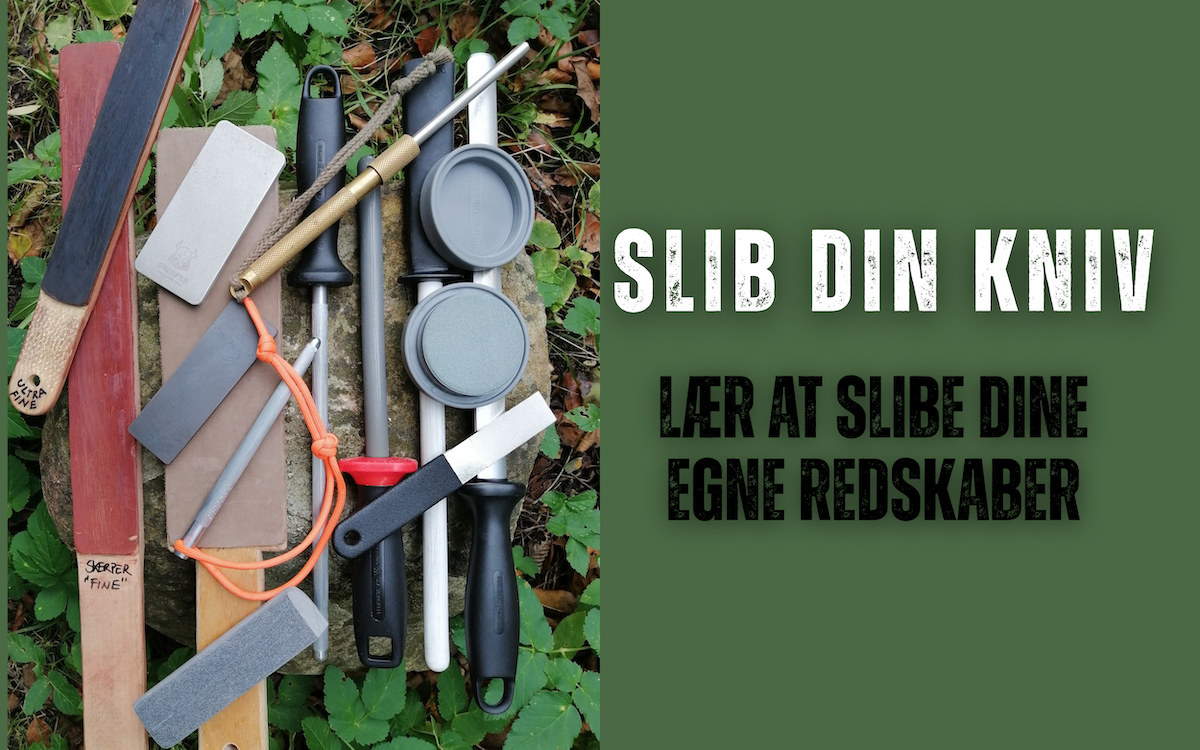
Learn to sharpen your knives and tools yourself
Not everyone is equally enthusiastic about this task, but it is something you can practice. To keep your tools in the best and sharpest condition and for your own safety, you should keep your tools sharpened; read more about how and why below 👇
Why should I even sharpen my tools?
- You use too much force with dull tools, so you tire yourself unnecessarily.
- The most important argument, however, must be that dull tools become dangerous.
- When you use a lot of force to get the knife to cut, and it finally goes through your material, your powerful movements are clumsy. Your chances of carving or stabbing yourself are far too high.
- It should also be mentioned that any nicks in the edge transfer to your carving material. So it can actually be seen on your newly carved spoon that your knife is poorly sharpened or unsharpened.
How often should I sharpen?
The short answer is: "As often as necessary."
On YouTube, many argue for "the knife that never needs sharpening," or almost never.
Let's just say it right away, it doesn't exist!
Your tools may hold their edge for a long time, but often you will also need to spend correspondingly more time sharpening it up.
For ordinary craft tasks, I am more a fan of the "soft" knife blade.
I prefer to sharpen more often...
If the knife is otherwise maintained, it only takes a few seconds to make it sharp. .
I save the super steel for a survival situation, or for when the zombies come.
What is the actual task? And how sharp does your knife or axe need to be?
Do you need to do precision work?
Is the wood dry or wet?
Is it an axe for splitting firewood?
If you need to sharpen your Elver sword, which with one strike should be able to cleave an Orc, then of course you need to spend some time on your edge.
If, on the other hand, you need to cut open the plastic bag on your ready meal, well... then it will probably do just fine.

In this post, I will primarily focus on the scandi-sharpened knife. The reason for this is that it is the type easiest to sharpen yourself.
There is a "bevel" on each side of the knife; it is this surface that tapers down to form the actual edge.
The knife must lie flat on this surface to be sharpened on the whetstone.
It is possible to "feel" and "hear" this surface when you sharpen the knife. Which can be much more difficult with other types of blade sharpening.
What is the starting point?
First and foremost, it is important that you have proper tools to work with.
Your knife won’t get sharper than the quality of the steel it’s made from.
The same goes for your sharpening system; the edge on your knife won’t be better than the quality of your sharpening system.
When we talk about the quality of your knife, it’s not just the steel that matters. The craftsmanship of the knife itself is also important.
It can have decent steel, but the edge may be poorly made, which results in poor cutting performance.
Quite a few manufacturers simply have poor quality control at the knife factories.
This also applies to relatively expensive knives!
Many of these knives can be “fixed” and become quite good, but it takes time, effort, and knowledge to restore the knife’s condition.
That’s why it’s much easier to buy a knife that is good from the start. That doesn’t mean you have to go out and buy the most expensive one you can find on the market, but it can be a very good idea to learn about the types available, figure out your needs, research the market, and spend the necessary time asking friends and reading reviews before you spend money.

Sharpening systems don’t have to be expensive to work, you can actually get sharpening equipment at a hardware store without spending a lot of money.
Here are some different techniques and equipment you can consider.
Sharpening jigs:
If you have really bad experiences sharpening your knives, there is also the option to buy some sharpening jigs.
It’s a kind of stand where you clamp your knife in place.
Then you sharpen your knives using a “base” and a sharpening arm that holds the stone.
This keeps the knife and sharpening equipment always at the correct angle.

Japanese whetstones.
You can find plenty of videos online showing how to use whetstones to make knives incredibly sharp.


Japanese whetstones can produce a very sharp cutting tool. However, it should also be noted that it requires a lot of practice, and the stones are quite expensive to acquire.
The stones require maintenance, or a good understanding of how they wear down.
Smaller sharpening stones like the one shown here are mainly used when you are on the go. These stones serve the purpose of keeping your knives and other tools in good condition. If you have patience, you can actually also fix regular damage to the edge. That is, if the damage isn’t too severe.

Practice.
My next advice is that you should start by practicing on an old knife.
Consider buying some old knives at a thrift or flea market, practice on them before you start on your expensive knife. This also applies to other types of tools you want to sharpen yourself.
Use a marker pen.
When you start practicing sharpening, paint your bevel with a black marker.
This makes it easier for you to see where material is being removed.
Paint the area completely black, or paint a grid down towards the edge.

Sharpen again and get a better overview.
There may be areas on the knife’s bevel that need focused sharpening.
Maybe there is a nick in the edge, or the bevel is uneven from the factory.
With the marker pen, it’s easier to keep track of whether you are sharpening the right spots.


In the pictures below, you can see how to change the knife’s characteristics.


Make polishing strops and sharpening sticks for knife sharpening.
The following procedure allows you to create polishing strops, but also sharpening sticks.
A short one, a long one... A stick... A dowel... a bell that goes ding dang.

The sharpening stick is used for actual sharpening of an edge.
The leather strap is used to keep the blade sharp. The edge is actually okay, but it can be made a bit sharper.
You will need:
- Find an old stick, maybe you have an unused paint stirrer?
- Double-sided tape.
- A strip of leather.
- Wet-sanding sandpaper (can be used wet!)
- grit 400, 600, 800, 1000, 1200.
- Optional sharpening compound.

Make yourself a suitable piece of stick. By that I mean, can the stick fit in your bag.
Is it for a short or a long knife? Etc.
Put double-sided tape on your stick.
Cut it to fit the width of the stick!
Place a piece of leather on the stick and cut to size. Now you have a strap used to maintain your knife's edge.
Do the same with the wet sandpaper. Now you have a kind of sharpening stone!
It’s for the knife that needs a little sharpening, a knife that maybe has what’s called a burr. The stone is not intended for a knife that needs to be sharpened “from scratch”!
The stone doesn’t last as long as a sharpening stone, but it works quite well, and you haven’t broken the bank.
You can optionally have leather on one side of the stone and wet sandpaper on the other side.
How to use this stone… And can it be improved?
Whether you use the stone with wet sandpaper or leather, it is used the same way.
Use them like a classic sharpening stone, the edge is laid flat on the sandpaper or leather.
Now the knife is pulled across the surface, away from the edge!

With a classic sharpening stone, you can easily sharpen “against” the edge. You cannot do that with this method!
When you reach the point on the blade where the edge curves toward the tip, you need to raise your hand.
This is done to follow the curve of the edge; stop before the tip leaves the surface of the stone!
This way you don’t round off your knife tip and it doesn’t get dull.
When sharpening with the sandpaper, you need to feel and listen.
You need to feel whether the knife rocks or lies flat.
You need to listen because you can actually hear when it’s not lying flat.
Now the goal is to sharpen equally on each side of the knife, roughly speaking. :-)
Count continuously as you sharpen.
At first, you can sharpen 10-12 times on one side, then do the same on the other side.
Next round, i.e. when you sharpen the first side again, reduce to e.g. 8 strokes per side.
With each round, you reduce the number of strokes.
Until you only stroke once on each side, this is done several times in a row.
Grit size of the wet sandpaper?
The best result is achieved by moving up through the grit sizes on your wet sandpaper.
Start for example at 400 and move upward through the grit sizes. This is the method if the knife really needs some tender care.
If moving through the grit sizes becomes too much for you, you can make three jumps. For example, 400 - 800 - 1200.
Now you can actually use the knife for most tasks.
but, but….
Now imagine a micro metal edge on the blade, rocking from side to side as you sharpen.
The goal is for this edge to disappear completely; when that happens, the knife is really sharp.
To make the knife sharper and keep it sharp, it needs to be polished.
This is done with the strop (the one with leather).
The leather strop is used exactly the same way as the sharpening stone.
If you have done your prep work well with the wet sandpaper, you will notice your bevel becomes shiny when you use the leather strop.
When your bevel is shiny, it will be smoother, resulting in less resistance when using the knife.
This makes the knife work more easily on the materials you carve.
There is also some resistance to corrosion (rust) when the knife is shiny.
👉 Your leather strop can be improved with polishing compound.
Polishing compound can be obtained in different coarseness levels, which means that, like with wet sandpaper, you can work your way up through the fineness of your edge.
The coarseness is recognized by being divided into colors.

💡 For carving knives and other curved blades, a round file is used instead of a flat one.
The method to create a sharpening rod is exactly the same.
It’s the same when sharpening with the rod.
What can help you?
Here I will mention a few things:
A magnifying glass.
Look closely at the edge to get an idea of what the problem is.

Stay away from electric and non-electric V sharpeners. There is a high chance they will damage your knives.

If the manufacturer of your sharpening stone says you should use oil on your stone, be sure to do so!

How can I quickly sharpen my tools in a pinch?
For example, if I have forgotten/lost my equipment.
These suggestions won't sharpen your knife well, but they can make it sharper.
- The top edge of a car window.
- The underside of porcelain cups and plates.
- Old-fashioned electric insulators (bells for power lines). They are sometimes found on fence posts.
For stropping:
- Your leather belt.
- Newspaper, or the pages of a book.
You get the best results with good tools that are completely sharp, so it's never a waste of time to take care of your equipment. The pleasure of carving with a freshly sharpened blade is truly great – and the regret of not having done it is even greater.
Enjoy sharpening your tools 😃
Don't have the right sharpening tools yet? At Survivalstore.dk you'll find everything you need to sharpen and keep your knives sharp.