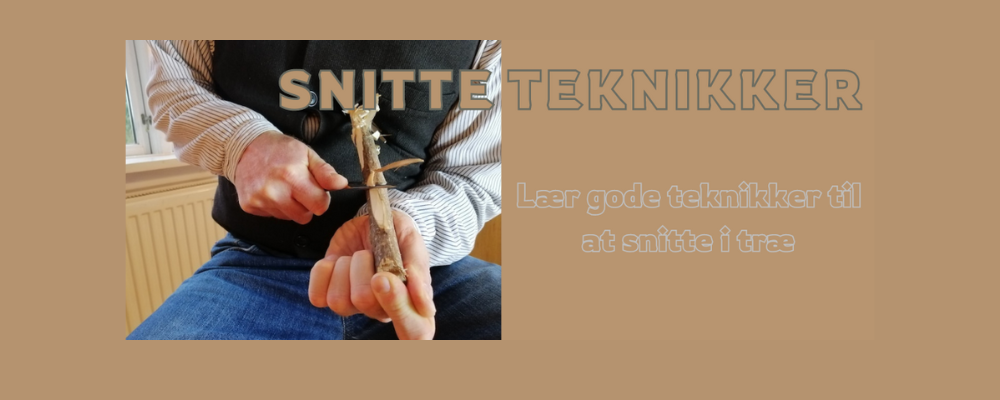
Carving techniques
If you haven’t cut or carved wood recently, maybe you remember doing it as a child.
A stick that became a sword!
Branches were carved to then be used for a den in a bush?
There are all sorts of good reasons to take up this activity again, not building dens, but carving.
Maybe you sat in front of a campfire with some friends…
Scratched a bit on a stick with a good old-fashioned scout knife you inherited from grandpa?
Maybe you thought… this is quite cozy.
Now the question is… how can I make my creations a bit nicer… more useful?
Carving gives you a moment of good relaxation.
It’s an activity that can be done without costing a fortune.
You can quickly learn to create useful objects that you will probably connect with in a different way than all the “artificial” things around us.
First aid when carving wood:
It’s a good idea to have some kind of first aid kit ready.
At some point, you will probably carve yourself – likely not seriously – but have a bandage ready.
Be careful when using the tools and use them sensibly.

❗A bit about safety when carving – it can’t be said too often:
- Do not carve between your legs! There are some large blood vessels on the inside of your thighs that you do not want to cut.
- Carve on the outside of your thighs, or in front of your knees.
- Do not stab with your knife unless you have learned the proper techniques for it. For example, by having your thumb on the end of the knife.
- When the knife is not in use, it should be in its sheath!
Briefly about axe techniques:
Now you might be thinking, why are they talking about axes when it was about carving techniques?
-Because the axe is a “helping tool” when you carve. The axe often does the rough work, and then the knife takes over when you have roughly shaped the object.
- Use the axe on a stable chopping block.
- The axe chops straight up and down; the axe hand does not angle!
- It is the hand holding the object that changes angle.
- Bend your thumb inward and away from the working axe.
- Always chop below the hand holding the object!
- Place the object furthest away on the stump! If you miss, the axe will land on the stump.
In this post, we will only look at carving techniques related to the knife.
Choosing a carving knife:
To even get started, you need a good knife, and it must be sharp.
It’s about safety, but also about the final result on your product. Any nicks and scratches on your knife blade will show on your finished product, as they leave marks on the surface.
When it comes to carving wood, a knife with a scandi grind is preferable.

Mora of Sweden makes knives of superb quality - these are suitable for all kinds of tasks and ideal for carving projects.
Then you need something to sharpen your knife with, i.e., a type of sharpening stone that can make your knife sharp enough.
There is a saying that goes, “the right tool is half the work”.
-That is truly correct!
The same goes for your wood blank. Your final result won’t be better than what you started with.
Helper tools/objects:
The following tools can help you well on your way to achieving your finished carving result:
- A good axe.
- A stack of wood logs.
- A small saw.
- Possibly a spoon knife?
- Possibly a wooden mallet.
Don’t jump into a project that’s too big, and don’t choose something too difficult to start with. Rather choose a small object that you can complete. For example, a butter knife.
Sandpaper:
If you choose to use sandpaper, remember this:
- Sand along the grain.
- Jump up in grit size. This gives the nicest result. For example, 400 - 600 - 800, etc. (The higher the number, the finer the sandpaper).
- Sandpaper is only used once the product is completely dry.
- Do not use your knife on the product again after you have started using sandpaper! Small grains of sand get into the wood, which is bad for your tool!
Try stick:
If you want to practice some carving techniques before starting a project, you can, for example, try making a “Try Stick”.
A try stick is simply a stick that you carve some specific cuts into to practice.
You can find plenty of videos on YouTube about the topic, just search away.
You can also look up Mors Kochanski and try stick.
Make your try stick from, for example, willow, hazel, or linden. -Remember; no knots!
Carving across the grain, versus carving with the grain.
Maybe you once learned that you should carve with the grain of the wood, which is basically correct. But when you want to make more complicated products like a Kuksa (drinking/eating cup), you will find that you also need to work across the grain.
See for example our post about carving a simple cooking spoon - it is illustrated there.
Sometimes it is not possible to cut along the grain. Other times the grain lies in such a way that the best result comes from cutting across or diagonally. It can be a good idea to start by making a spoon; it will give you a good understanding of this.
Grain run-outs and the direction of the wood grain.
When you whittle wood and thus work down through the structure, you cut through the growth layers and the wood’s grain. This can present some challenges.
You will experience your wood “fraying,” which also happens to people used to carving wood.
Cut from both sides of the area; this way you can create a smoother transition.
The problem especially arises if you have a deep-set area on your product.
In some cases, it can be advantageous to wait until the wood has dried before finishing your product.
Knots.
The same applies to knots.
Cut from each side of the knot; this gives the neatest result.
You may have to whittle several times from each side before it looks neat.

Cut or press?
When working with a knife, there is a big difference between pressing with or pulling the blade.
When you pull the knife, depending on its design, it can make a very effective cut.
When you pull/slice, you use most of the blade, and the knife cuts through the material.
This is where you use the least force to get through the wood.
Techniques where you press, definitely require a sharp knife.
Techniques where you press often involve working perpendicular to the grain in the wood (90 degrees to the grain).
All work in wood varies depending on whether you work with or against the grain.
That is also the reason why a saw blade is designed differently if, for example, you need to cut along the grain.
When do you pull? When do you slice?
Try to become aware of when you do what while whittling.
What do you do when you debark a smaller branch?
What do you do in the following “power cuts”?
The same applies to the axe.
It can also be beneficial to practice using it with a more “cutting chop.”
Below you will find selected techniques described with pictures and text.
Some of the techniques will definitely require more practice than others - so don’t despair, just keep practicing.
First, there are some grips that give you a lot of power, they can help you remove a lot of material at once.
Power grip:
Downward power grip against chopping block.
Here it is important that you stretch the arm holding the knife, otherwise you will tire your arm too much. Lean forward and use your body weight.
Your knife is not swung out into the air, which is safer for others.
Disadvantage: the knife can become dull from hitting the block repeatedly.

Knife in chopping block:
Be careful your hand does not slip down onto the blade, remember to have your thumb on the end of the knife when you place it in the block!!!
Use an existing crack if possible. The knife must be firmly seated!
Now you hold the knife, and with the other hand you pull your carving piece across the edge.
It is not the knife hand that works, but the hand holding the carving piece!
It is a controlled way to work.

Knee fixation:
Place the back of your knife blade under your kneecap.
Make sure the knife is fixed! The hand also supports on your leg!
Now you pull the workpiece over the knife blade. Again, it is the work hand that works, not the knife hand!
Watch your legs, be careful not to cut yourself in the leg!

Power cut on the side of the body:
Here you see the absolute best way to carve for a beginner.
Specifically on the side of one of your legs.
If it is to be performed as a power cut, your knife arm is extended, and it is the work hand that pulls!

Scissor grip or "chest lever grip":
Here the hands are placed under the chest, with the workpiece in one and the knife in the other.
Slightly curve the chest.
Now the large back and chest muscles are tensed and released.
Both the knife arm and the work hand move backward.
A very powerful cut is released.
The arms are held close to the body when performing the technique; the elbows can be away from your body.

Other grips that are not actual power grips, but still powerful:
Pressing with support:
The knife can really dive deep into the wood, especially if the knife hand makes some rocking movements.
This technique can be good if you want to make a 90-degree edge straight down into the wood.
If you need to go very deep into the wood, it can be more advantageous to use a saw for the first steps.

Here are two carving grips where the hand is fixed against your thigh:
Fix the knife hand on the thigh - reverse grip:
With this technique, it is the work hand that pulls!
The knife hand is held firmly against the thigh when you carve.
Make sure the knife hand does not lower down towards the thigh!

Fix the knife hand on the thigh - forward grip:
Same technique as above, just with a forward grip.
Remember to fix the knife hand on your thigh when you carve.

Next follow some carving techniques more suited for detailed work:
Thumb supports against the piece:
The knife is pulled towards yourself.
The thumb supports the piece while the hand clenches.
A bit like if you were peeling a potato with a knife.

Notice that the thumb is away from the knife’s path.
The knife is not meant to be pressed against the thumb!

Scissor grip with thumb push:
Thumb pushes, and it’s mainly the thumb that drives the cut.
It can be done pushing straight forward, but also more with a “can opener” motion.
The technique allows you to work detailed and controlled.

The downside of this carving technique is that it can be hard on your thumb over time.

Here the technique is shown with a cross grip.
Works well if you need to cut (slice) very controlled forward or backward.

Guided pull grip:
Index finger, middle finger and/or possibly ring finger assist.
The supporting finger is pulled together towards the body.
Good for inaccessible places.
Good if you have trouble reaching because your grip gets awkward, for example if you can’t reach from that particular side.

Pull grip:
Here you do what you’ve always been told not to do - pull the knife towards your own body.
However, it’s important to do it the right way.
Press the piece against your body.
Notice that the knife is held in a side grip, meaning the knife lies on its side in the hand.
The thumb rests on the knife blade!
Now comes the most important part.
Forearm and elbow are kept close to the body!!
Your knife arm won’t extend further once your wrist hits under your chest, that’s what makes the technique safe.
So make sure to keep your forearm close to the side of your body!!!

Now all that's left is to start practicing carving some wood!
Check out these carving sets - some really good tools when you want to carve wood.
Have a great time with your carving tasks 😃