Being able to use a compass is a basic but often overlooked skill that can make all the difference when you move off the trails and explore the outdoors. Whether you’re new to outdoor life, scouting, a new hiker—or just curious—this guide is made for you.
In a world full of GPS and smartphones, using a compass may seem old-fashioned, but it is still one of the most reliable ways to find your way in nature. Whether you’re planning a mountain trip, a hike in the forest, or just want to learn a classic scout trick, being able to use a compass is an invaluable skill—and it’s both fun and exciting to learn.
At first glance, it may seem technical, a bit complicated, or reserved for people with special knowledge of navigation and orientation. But in reality, the compass is a relatively simple yet highly effective tool that anyone can learn to use. It just takes a little practice and understanding, and then it quickly becomes a natural and reassuring aid to finding your way in nature.
A compass can give you peace of mind and security when you’re in unfamiliar surroundings, and it gives you control over direction without having to rely blindly on technology like GPS. With the compass in your hand, you can navigate in a way that is both precise and reliable, and that makes you more aware of your position in the landscape.
In this guide, you will be introduced to how to read and use it in conjunction with a map. Everything is explained in easy-to-understand language, step by step, without complicated technical terms or jargon, so you can feel well prepared—regardless of your experience level.
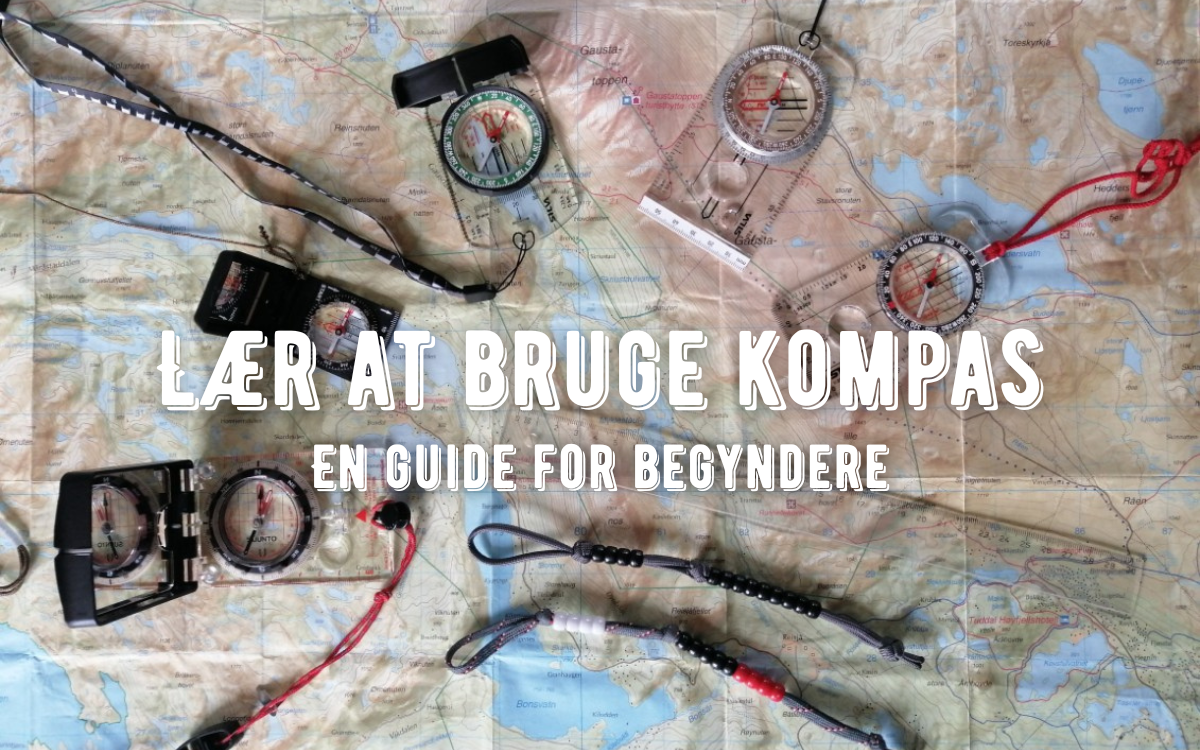
Let’s start from the beginning:
The most basic thing we can say about compasses and maps is that the top part of the map is always north, and the arrow on a compass shows you where north and south are.
This is how it basically works, and we’ll try to add a bit of extra information here.
The use of a traditional compass has declined since smartphones/smartwatches and GPS navigation devices have become common.
However, there is something fantastic about the manual compass, which can never run out of power.
When you use a compass to find your way, it constantly demands your attention and awareness of your surroundings. You need to stay alert and conscious of where you are in the landscape, which landmarks you see, and how they match what you see on the map. This requires you to actively follow along and relate to the terrain so you don’t lose your orientation or move in the wrong direction.
As you move through the landscape, you need to constantly assess your position and ensure you maintain the correct course. This ongoing awareness means you are always learning something about the nature and environment you are in – something you can easily miss if you simply follow a route on a handheld GPS without thinking about it.
Using a compass promotes an active and investigative approach to navigation, where you build a natural understanding of your surroundings. It creates an interaction between you and nature because you are not just being led around but are responsible for finding your way – and it strengthens your ability to read the landscape and think in context.
There is, of course, also the option of bringing it along with a handheld GPS. If, for example, you are traveling in very remote areas, this is definitely recommended for safety reasons.
Let's get started.
1: What type of compass should I buy?

First and foremost, it doesn’t have to be terribly expensive to be worthwhile. It is actually possible to buy decent compasses for under 200 DKK when they are on sale.
In general navigation terms, there are two types that are interesting. The common and probably best-known baseplate compass, and then the mirror compass.
In short, we can say that the baseplate compass is a slimmer compass, which is easy to use in all types of terrain.

The mirror compass is especially useful in open terrain, where it allows for very precise bearings.
It also has the advantage that the mirror can be used for other tasks. For example, it could be for signaling, hygiene, or if you happen to get something in your eye.

A standard compass is usually not a big financial investment – in fact, most good compasses are relatively inexpensive to buy. For this reason, it’s also not the place where you should try to save money.
It can be tempting to choose the absolute cheapest model, especially if you are a beginner, but this can quickly turn out to be a bad decision. The market is full of compasses made with poor quality – often with an imprecise needle, weak materials, or poorly calibrated scales. These models can be hard to read, unreliable in use, and in the worst case, downright misleading. This can make it difficult to learn how to use the compass correctly and even lead to navigation errors. Therefore, it’s a good idea to be critical and choose a compass known for its accuracy and durability – even if it costs a little more.
If you are about to buy your very first compass, it’s a good idea to avoid the more advanced military compasses, which often come with sights and a heavy aluminum case. They may look impressive and sturdy, but they are typically designed for specific purposes and situations that most people don’t need for regular outdoor navigation. Instead, start with a simple, user-friendly model – and if you later need something more advanced, you can always upgrade.
Baseplate compass
It’s the most common and beginner-friendly compass. It has a transparent baseplate, often with a scale, right angles, and guide lines for use with maps. It’s perfect for general map reading and navigation on hikes, scouting activities, and in teaching.
Advantages:
Light and simple to use
Good for maps and straightforward bearings
Suitable for beginners and those with some experience
Mirror compass
A mirror compass has – as the name suggests – a small mirror in the lid. The mirror is used when you need to take more precise bearings, for example over long distances in the mountains, where it’s important to be able to read the compass while aiming at a point in the terrain.
Advantages:
More precise bearings over long distances
Good for navigation in challenging terrain
Often used by experienced hikers and in rescue situations
Which one should I choose?
If you’re a beginner, a classic baseplate compass is perfectly fine – it’s actually ideal. It’s easy to learn and you can use it for almost everything. If you later go on more advanced trips in mountains or wilderness, you can upgrade to a mirror compass – but it’s definitely not a must from the start.
How does the compass actually work?
It works because the Earth acts like a giant magnet. The small magnetic needle in the compass is attracted by the Earth’s magnetic field and aligns with magnetic north. It is affected by other metals and magnets, so you should keep it away from mobile phones, metal objects, and live wires when using it, as these can otherwise lead you in the wrong direction.
What makes a good compass? Here’s what to look for:

Direction arrow – The red arrow on the compass baseplate that points in the direction you should walk.
North arrow (fixed arrow) – The rotatable arrow in the compass that points north.
Reading mark/line – The spot on the compass where you read the bearing in degrees.
Compass meridians – The lines inside the compass (inside the capsule) used to align with the map’s north.
Guide lines – The lines on the baseplate used to align the compass parallel to the map’s lines.
At first, you shouldn’t have a compass that’s too small. It’s an advantage if you can find routes on the map with the compass without needing to use a ruler alongside it.
It should be easy to read. This means there must be a line that allows you to precisely read a degree on the "compass housing".
It can be helpful to have a magnifying glass/loupe built into the compass itself, as some symbols on a map can be quite small.
Likewise, there should be the most commonly used scales 1:25,000 and 1:50,000. At minimum, there should also be a centimeter scale.
If you need to navigate at night, it’s an advantage if the most important parts of the compass are luminous.
How do I use the compass?
Of course, you can use it without a map. It will be a "Coarse orientation," meaning you’re heading in the overall right direction.
It could be that you know the direction you need to go to reach a general area in the landscape. Or that at some point you had a clear view of a specific point in the landscape. Here the compass helps you stay on course.
It could be that you’re standing on a high point, seeing a place far away that you want to reach. You might need to pass hills and forest to get there. There’s a chance you might walk in circles along the way or end up passing your destination without noticing it. In such a case, you can take a compass bearing and follow it to go straight toward your goal.
Where the compass really shines, however, is in combination with a good map.
Here its full potential really comes into play.
Outdoor navigation – the classic duo: map and compass
When you head out into nature – whether hiking, orienteering, or on a scout weekend – it’s important to be able to find your way without relying on your phone. GPS and apps are handy, but they can run out of battery or lose signal. This is where the old classics come in: map and compass.
A topographic map gives you a detailed overview of the landscape – hills, trails, lakes, contour lines, and much more. The compass helps you orient the map and find direction, so you can move safely and purposefully from point A to point B.
When you combine the two, you have everything you need to plan your route, adjust along the way, and find your way back, even when the trail disappears. It takes a bit of practice, but with the right techniques, you'll quickly become comfortable with outdoor navigation.
The first thing you need to do is get a good map of the area you will be hiking in.
A hiking map should not have a scale larger than 1:100,000.
This means that 1 cm on the map equals 100,000 cm / 1000 meters or 1 km.
Maps with a scale larger than this become "road maps," i.e., maps used for driving. They simply lack details.
Always look carefully at your map before you set off!
Notice recognizable features in the landscape.
It could be streams, cliffs, or power cables.
Use these when navigating in the real landscape. They tell you if you have gone too far (off course) or if you are where you should be.
Take time to study the legend on the map; how are different things marked on the map?

Likewise, contour lines.
It is the brown lines that lie more or less close to each other. Where these lines are very close, the landscape is very steep. You can use this in your planning; if a hill/mountain is steeply rising, you might need to take a different and longer route?
The places where the brown rings end in a circle are the tops of the landscape.

The map is also divided with a coordinate system, these are the lines you see all over the map. They form many squares. They show "True North" with their north/south meridians and east/west meridians. You will need these.
Depending on where you are in the world, there may be more or less "declination" on your map/compass. You will need to learn to distinguish this at some point. It is called: "True north" / "magnetic north" / "grid north," but we will look at this in a later post to avoid making this too complicated.
Here we start from the beginning.
Place the map flat in front of you.
Find the place on the map you are traveling from (point A at the bottom of the image).
Point B is the place you want to walk to.
Now place the side of the compass between these two points. Your marching arrow should point towards your destination (point B).
Optionally draw a line on the map; here you can add the calculated travel time, number of km, or other important info.

Now turn the compass housing so the compass meridian lines lie parallel with True North on the map. The upward lines found all over the map.

Now you basically know your course, but for some it can be an advantage to "north-align the map".
That means you turn the map so it matches your surrounding landscape. In other words:
...what you see on the map is also what is right in front of you in the landscape when you look up.
Turn the whole map in front of you, so the compass and everything follows.
Turn it so the red part of the compass needle lies inside the red lines! Now your compass and map face north.

Now you can read your course.
Find your small reading line in the compass housing.
301 degrees (western direction).
Note the division - the space between the small lines is 1 degree! The first line is therefore 2 degrees.

Now hold the compass between waist height and chest height.
The red part of the compass needle should be between the two red lines. Turn your whole body until the needle lands where it should. The needle should be here every time you need to find your direction.
You should now follow your marching arrow. It is the arrow at the front of the compass.

Look at your compass and map often, are you off course?
Do you encounter the correct contours in the terrain? This is important to avoid going too far.
Now you are starting to navigate... great - and enjoy!
💡 A quick trick to orient the map
Place the compass on the map so it aligns with the map’s north-south lines. Turn the compass needle until the red end (north) points to the map’s compass meridian north. Voilà! Now your map is correctly oriented to the terrain – and you can start navigating like a pro.
In a later blog post about using a compass, we will go even deeper into compass use. Among other things, we will take a closer look at:
Declination, Magnetic North vs. Geographic North, how a compass works, different types of compasses, alternative navigation methods, and much more – so look forward to it!
Consider signing up to receive our newsletter – here you’ll get notifications when new, exciting blog posts come out on all kinds of topics within bushcraft and outdoor life, if we have great deals on gear and outdoor equipment, and much more exciting stuff – and we promise you won’t be bombarded with emails.
Learning to use a compass doesn’t have to be difficult or boring – it’s just about knowing the basic principles and practicing a bit. Once you know how to find north, read bearings, and use it together with a map, you have a powerful tool in your hand that can guide you safely through nature – even when technology fails.
So next time you pack your backpack for a trip, take the compass and a map with you. They don’t take up much space but can prove to be invaluable.
Finally, here are some good tips that can help you when you need to navigate:
1: Practice in calm surroundings first
Before heading out into the wilderness, practice at home, in the garden, or in a park. Lay a map on a table, place the compass on top, and try following the instructions. It’s much easier to learn without pressure – and without mosquitoes buzzing in your ear!
2: Remember to keep the compass level – super important!
A simple but often forgotten tip: If you tilt the compass, the needle can get stuck – and then it suddenly won’t show correctly. Keep it flat and still when reading the direction.
3: Avoid metal and magnets!
Compasses and metal are not good friends. If you stand close to a mobile phone, car, high-voltage power lines, or even a large zipper on your jacket, it can interfere with the needle. Step away a bit and try again if something feels off.
4: Compass and map must work together
A compass is not very useful without a map – and vice versa. The compass helps you with direction, but it’s the map that tells you where you are and where you want to go. Use them together as a team.
Common beginner mistakes – and how to avoid them
Forgetting to keep the compass level → The needle becomes unstable
Getting confused about the north arrow and the direction of travel arrow → Remember: the direction of travel arrow shows where you are going, the north arrow must align with north
Places the map without orienting it → Always orient the map to north first – otherwise everything will be reversed.
Takes a bearing without knowing the destination → Know where you want to go before you start taking direction.
What should you bring besides the compass?
A compass doesn’t do much alone – it works best with a good topographic map of the area. Additionally, it can be practical to have (not necessary – choose what makes sense for you):
-
Transparent map case / plastic sleeve.
Protects your map from rain, dirt, and wear. Bonus: You can use whiteboard markers on it to temporarily mark the route. -
Pencil and eraser.
To mark bearings, points, and notes directly on the map – or in a small notebook. Easy to remove and adjust.
-
Extra map or printout of the area.
If you only have one map and lose it, you’re stuck. With an extra copy, e.g. in mini format, you have a backup.
-
Ruler / distance measurer.
Some baseplate compasses have built-in measuring scales, but a separate ruler or a “distance tool” can help measure distances more precisely.
-
Fingerless gloves.
If it’s cold and you need to turn the compass and write notes, it’s super practical to be able to use your hands without freezing.
-
Headlamp.
If you end up navigating at dusk or in the dark, a headlamp is indispensable – and frees your hands for map and compass.
-
Magnetic shielding / small fabric pouch.
A small pouch to protect your compass from lying next to your phone, power banks, keys, etc. in your bag.
-
Backup compass.
A small button compass can be an inexpensive and lightweight backup if your primary one breaks or gets lost.
-
Weatherproof notebook.
Used to write coordinates, distances, observations, or reminders. Choose a waterproof version if you’re out in all kinds of weather.
-
Snacks and water.
Not technical navigation… but low blood sugar and a dehydrated brain = poor decisions. Keep your energy up = stay oriented!
Thanks for this time and have a great trip outdoors.
💡 Extra tip:
Signs in nature that can help you find direction.
Even without a compass, you can sometimes read nature.
Moss often grows on the north side of trees (but not always – it depends on moisture and shade).
The sun rises in the east and sets in the west – use it as a rough directional guide.
Ant hills are often located south of tree trunks, where there is more sun.
But remember: these methods are not 100% accurate, but can be a helpful guide.